How to Transcribe Audio or Video to Text
Español | FrançaisAutomatic speech-to-text uses artificial intelligence to convert recorded speech to words. Follow these steps to convert any audio or video file to text using the TranscribeKit add-on for Google Drive.
1. Install the Google Drive add-on
TranscribeKit works as a Google Drive add-on. You can install it by clicking here to go to the Google Marketplace and then clicking the Install button. Once you’ve installed the add-on you’ll need to go to your Google Drive and click the TranscribeKit icon on the side panel on the right to open it.

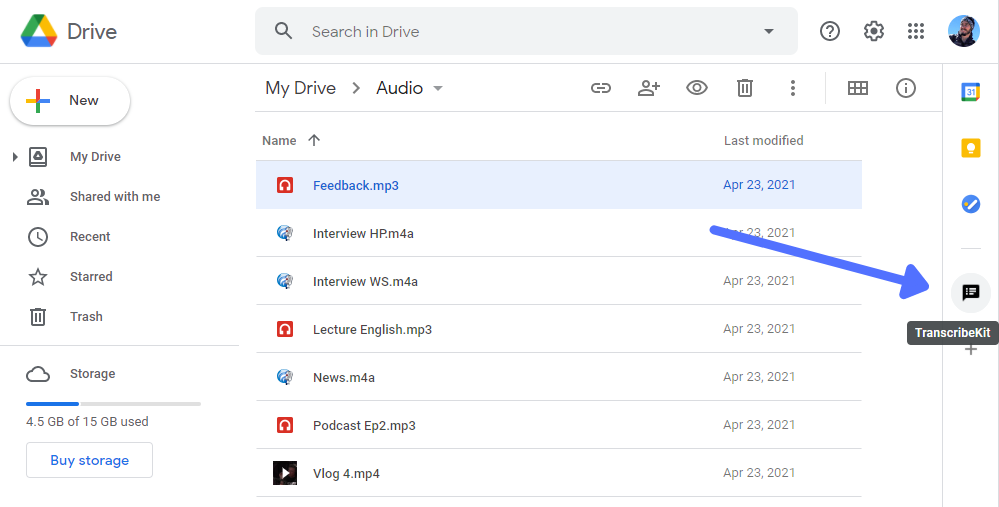
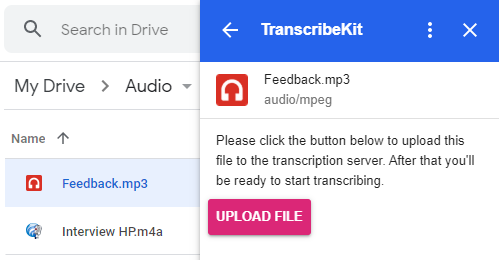
2. Upload your audio or video file
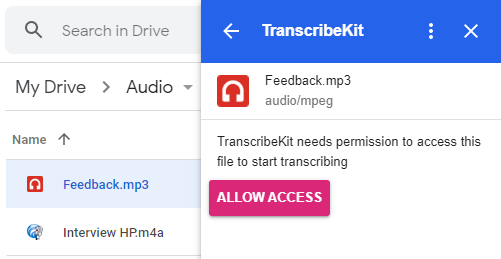
With the add-on open, click on any audio or video file in your Google Drive. Do not double-click on the file because then it will start to play. The add-on will detect the file that you’ve selected and an Allow Access button will appear. Click on it to give TranscribeKit permission to access the file. After that an Upload File button will appear, click on it to send the file to the transcription server. Wait a bit and then click the Refresh button and the next screen should be displayed.
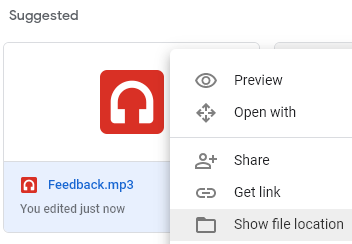
⚠ Clicking on files in the Suggested section at the top won't work. For those files you need to right-click and then click Show file location


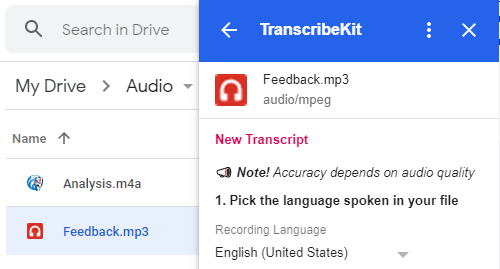
3. Select the language of the speech in the recording
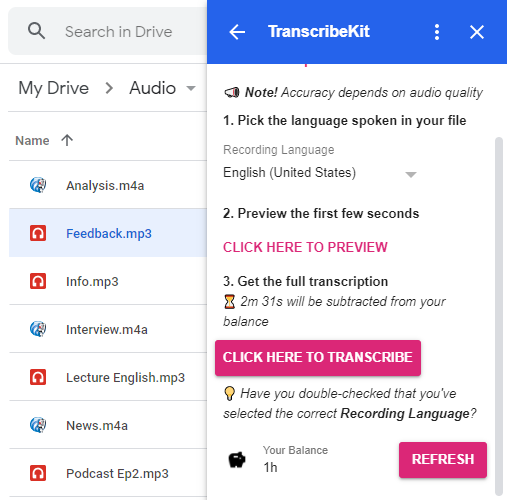
Once your file is uploaded, the New Transcript screen will appear with the Recording Language set to English (United States). If the language spoken in your file is not English then please select the correct language from the list.

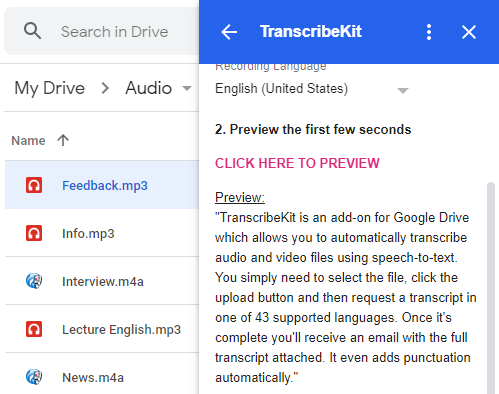
4. Preview the first few seconds
Once you have selected the correct language, click on the Click Here to Preview button. This will transcribe the first 15 seconds of your file.
If the preview is blank it could be because there is no speech at the beginning of your recording. The add-on will try to ignore silence but this will not work if there are sounds in the background. You can still go ahead and transcribe the file but please double-check that you have selected the correct language.

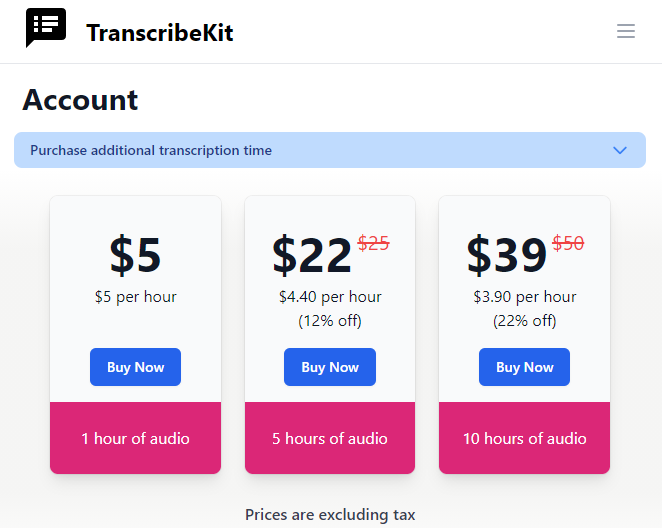
5. Purchase transcription time
If your transcription time balance is too low then "Click HERE to purchase more transcription time at TranscribeKit.com" will be displayed. Click on that link to open your account page on TranscribeKit.com in a new tab.
Once the Account page loads click on any of the Buy Now buttons to purchase either 1, 5 or 10 hours of transcription time using your credit card or PayPal account. Payments are processed by Paddle and you will receive an invoice by email.
If you want to purchase, for example, two hours you can click on the Buy Now button for 1 hour and update the quantity in the top left section of the checkout screen.
Once the payment is successful the transaction should automatically appear on your Account page (this may take a few seconds).

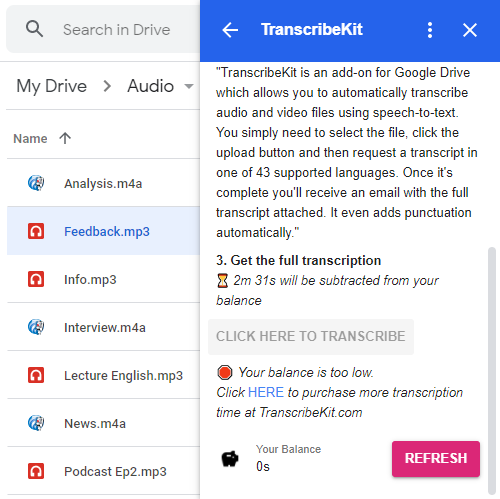

6. Request the full transcript
Now that you have transcription time you can return to Google Drive and click the Refresh button to update your balance. After that, click on Click Here to Transcribe and your request will be sent to the transcription server.
⚠ Transcription time will be subtracted from your balance so please double-check that you have selected the correct Recording Language.

7. Wait for the email containing the transcript
A screen will appear to let you know that your file is being transcribed. This should take less than an hour and you’ll receive an email once it’s complete. Note that the time it takes depends on the length of your file and how busy the server is so it may sometimes take longer.
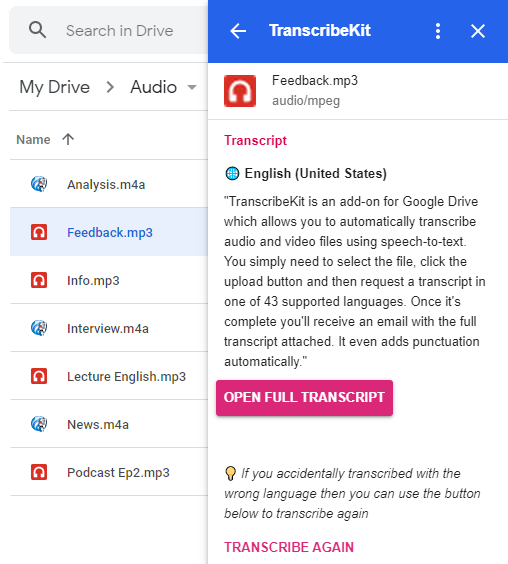
The email you receive will have an Open button which will take you to the full transcript. This can also be accessed by viewing the transcript in the add-on and then clicking the Open Full Transcript button. If you accidentally transcribed using the wrong language then you can click the Transcribe Again button in the add-on to try again. Note that this will subtract more transcription time from your balance.


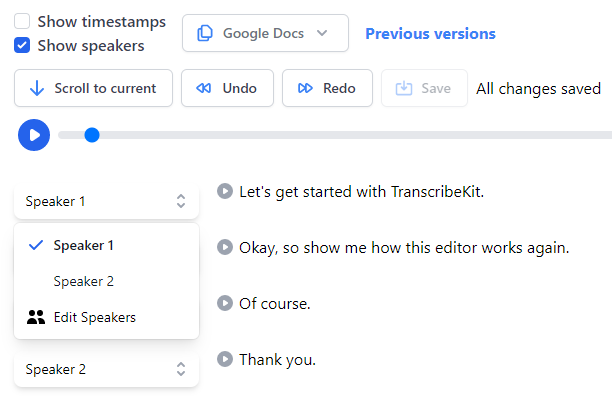
8. Make corrections and export
After opening the full transcript you can play back the audio, make corrections to the text and split or join paragraphs. You can also set the speaker for each paragraph (select Show speakers first).
Please note that only two speakers will be detected. If your audio contains more speakers then you can manually set them.
After making your changes click Google Docs then Export new Google Doc to create a Google Doc containing the full transcript. Exports are saved to the TranscribeKit Transcripts folder in your Google Drive.
If you need to view or revert to a previous version of your transcript then click on the Previous versions link.